Hand Carved Letter – Introduction to working with Chisel & Mallet
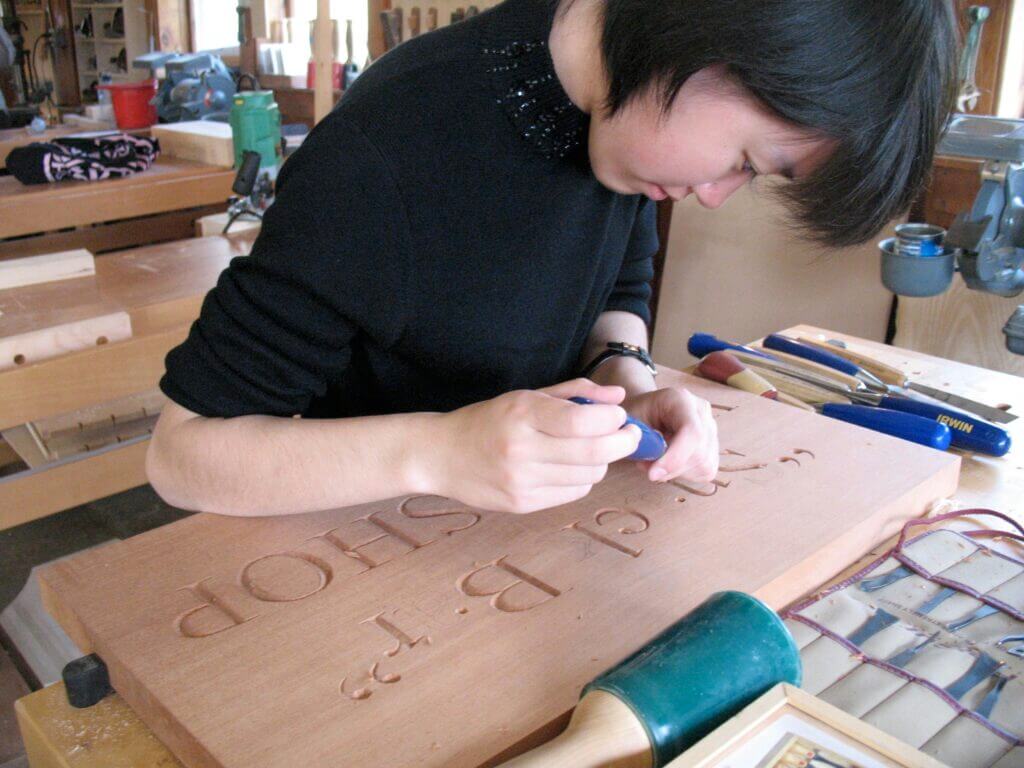
I was laying out, carving, and cleaning up a letter form with just a chisel & mallet. It started as a job. I was in the shop, and someone called the woodshop to inquire if anyone could make a commemorative sign for the Clark L. Stevens room. A new conference room in Hewitt Hall at the University of New Hampshire.I had never carved a wooden sign, but I had done lettering on granite tombstones for my high school job working for a local monument company. We would visit graveyards in the Upper Valley, filling in the blank dates on ‘dying statues,’..as my son calls them. It was fussy work, with no room for error. Who would tolerate the wrong date on a family gravestone?
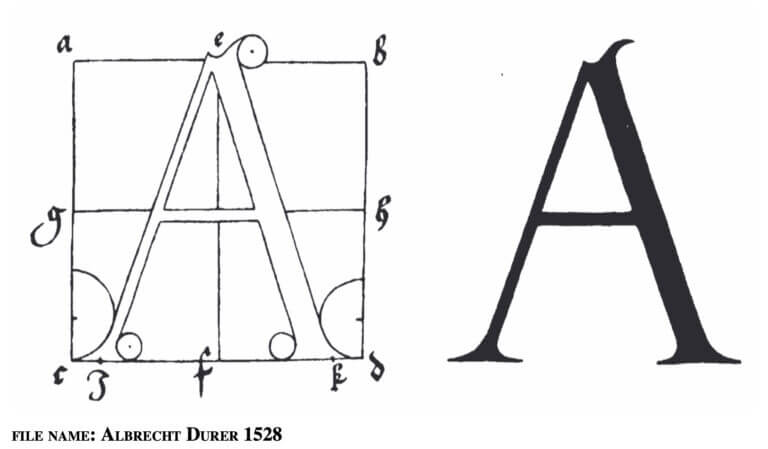
How difficult could it be to carve a wooden sign than cutting letters in granite? A friend Steve McHenry, who had carved several signs in Portsmouth NH, recommended I read “Of the Just Shaping of Letters: From the Applied Geometry of Albrecht Durer,” A serif is a serif, I thought. Before Digital fonts and Letraset, Albrecht Durer was my inspiration for laying out the sign for Clark L Stevens. Since then, I have carved signs, bowls, furniture, and sculpture. My start with a chisel was with carving letters. I now use letter carving to introduce two essential hand tools; Chisel & Mallet.
I ask students to begin with a 5″ x 5″ square block of maple or poplar. Most often, people choose a letter from their name. We design their letter in pencil. Using several layout and drafting tools: combination square for perpendicular lines, french curves, oval and circle templates for curved lines, and serifs, students find the ‘just shape’ to be carved. Next comes choosing suitable chisels and sharpening them. Oilstones are great for teaching sharpening to beginners because they are forgiving. It is almost impossible to gouge the sharpening stone. The most crucial step is holding the work because the 5″ x 5″ square block will need to be impacted from multiple angles, but more importantly, for safety. Cut the serifs first, then into the body of the letter. The shape of the letter is made by cutting a channel and blending it back into the serifs. Clean-up requires the right angle and blending from broad, deep areas into tight and shallow serifs. This simple exercise teaches much about tool use, sharpening, and working with or against the wood grain.
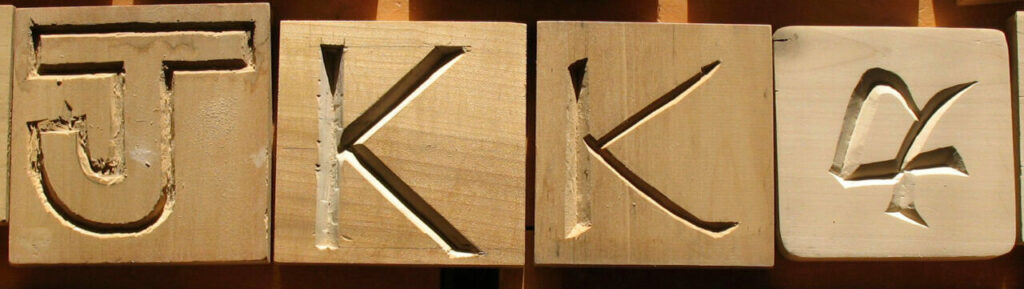
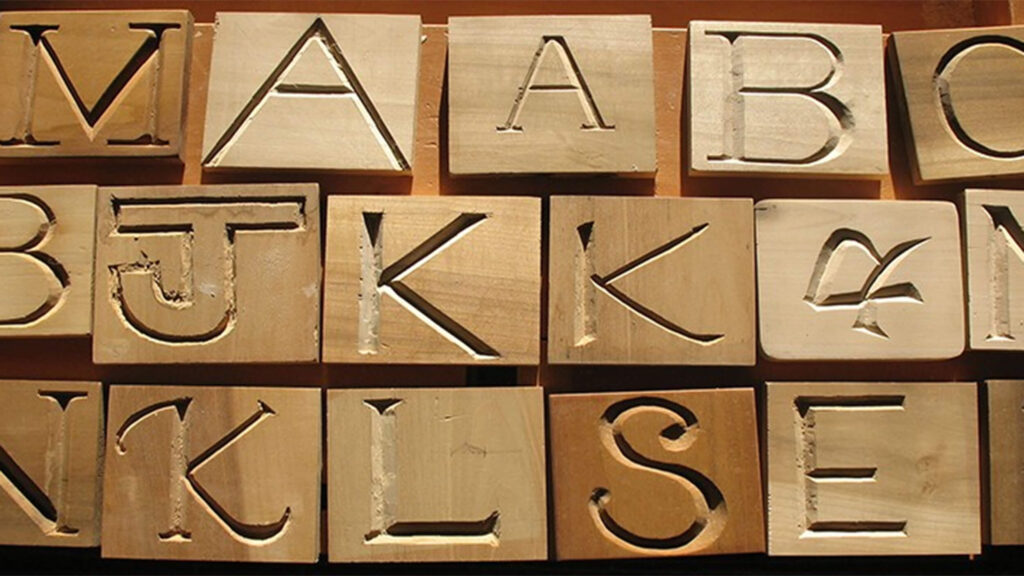
The term “make your mark” is nowhere more apparent than a carved letter. Everyone marks; the way they move the chisel in the wood is unique, as seen in the sample blocks in the title photo. Allen Breed, a furniture maker from seacoast New Hampshire, started his training with the conservator at the Museum of Fine Arts in Boston MA. Allen said he could recognize who had made historical pieces of furniture by the carving marks in the elaborately carved pieces that he had the opportunity to work through restoration and conservation.
Now it is your turn to “make your mark”.