
There are many ways to measure things in our world. To measure length, width or thickness, a rule is one of most simple yet essential tools for building. Reading a ruler is a foundational skill yet while teaching adolescents, I have met many young people that do not know how to read one, beyond the major increments; inches or centimeters
Questions like, what are these?” as a student points to the little lines between the inch marks. Imperial’ measure seemed to be as confusing as metric.
“You mean the bitsy’s?” I joked, “those are eighths, quarters and halves.” We were looking at the rule on the stop gauge at the back side of our kick shear, a machine that cleanly and precisely cuts sheet metal, when you kick down on the foot pedal. Before cutting, the work must be measured, laid out and the stop set. The stop determines the length of cut between the shear blade and the end of the sheet metal being cut.
As I was working with a teen student, setting up the stop on our kick shear, I asked the student, “ Do you want that aluminum sheet cut 1 ¼”, 1 ⅜” or 1 ½” ?”
“Which is bigger?, he replied.
After I explained how to read sixteenths, eighths, quarters and halves. I inquired, “ How wide do you want it?”
He replied, “I want it cut one and two eighths.”
“….are you sure you don’t want it one and a quarter ?” I asked.
It took him a little while but he got it. Encountering students that do not know how to read a rule is not a once off but a regular experience among newcomers in some shops.
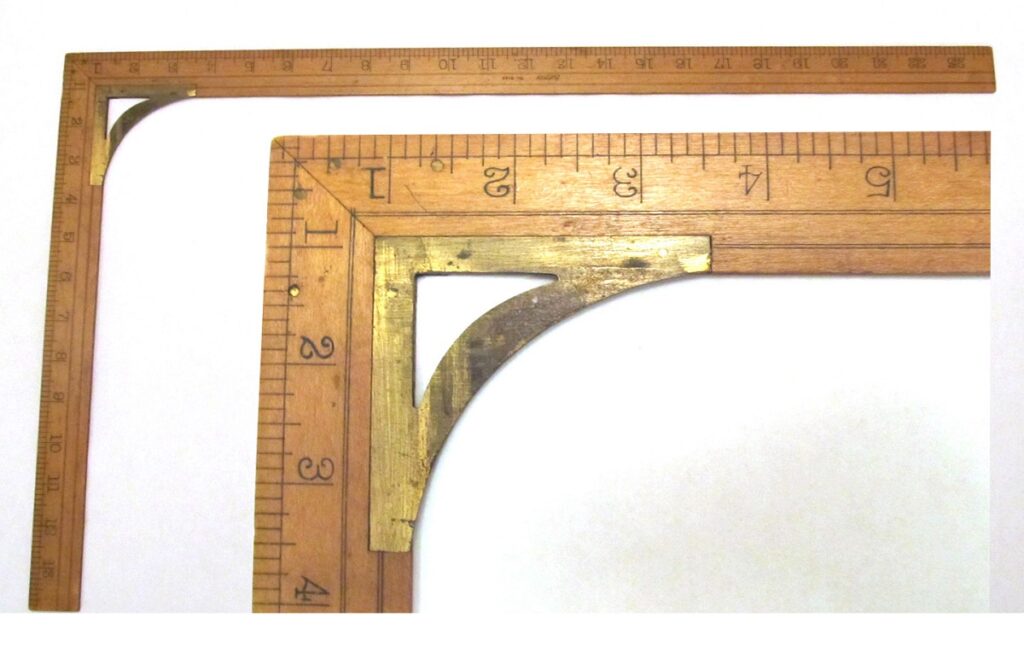
Lufkin Square – made of boxwood & brass
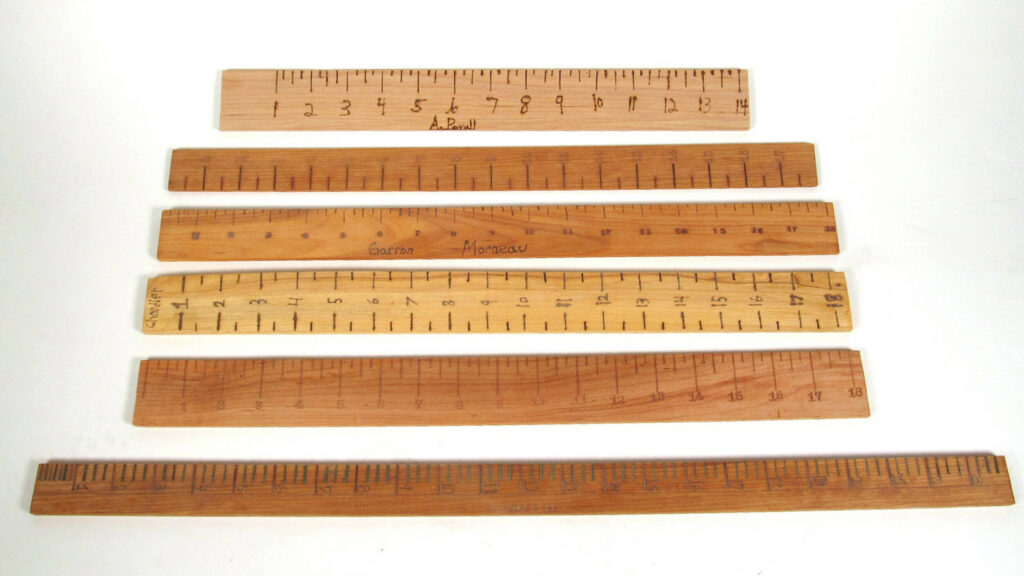
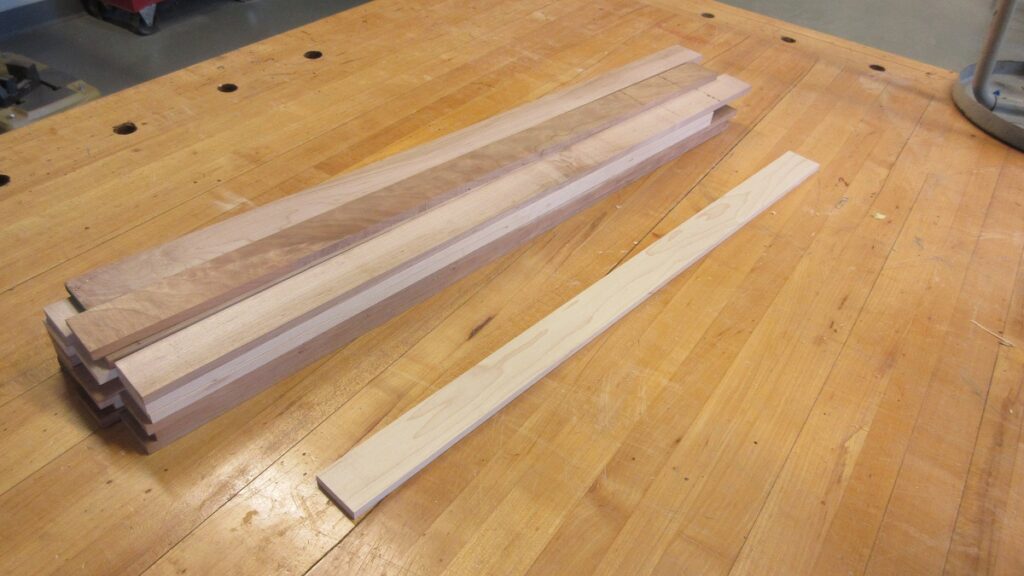
For many years, I have taught woodworking and architecture workshops. Since that experience, I sometimes ask students to make a wooden rule. I give them a hardwood batten ¼” x 1 ¼” x 36”. After explaining a ruler, fractions, how to make marks, and ruler design, I ask them to make their own ruler. As part of their design research, I ask them to bring in samples of rulers or measurement tools that have clear and distinct symbols and marks. I show my students several samples of rulers of which two of my favorite rulers are: a 24” folding boxwood rule and a 14” x 24” boxwood layout square that my wife uses for her sewing pattern making.
We discuss choosing a wood of fine grain that holds detail, like maple, cherry, or boxwood. The color of the wood is also important in order to allow the marks to be in contrast. I introduce students to several tools of mark-making. We make lines using a knife, awl, chisel or cold chisel. Numbers and letters are made with: letter stamps, Dremel tools, chisels, and engraving tools. We use milk paint to exaggerate the marks by rubbing paint into the surface and scraping away the top surface, to reveal a dark line, letter, or number.
Their finished product is to be anywhere from 18” to 24”. Students only need to lay out one side “imperial” or metric. There has to be graduation in precision with the smaller increments in the beginning of the rule, tapering off to less precise as the rule numbers progress.
There are a few simple activities one must know in order to make things: measure, cut, shape, bend, fit, assemble and finish. With digital tools at our fingertips, measuring things the ‘olde fashioned” way is still an essential skill for making. The act of making a rule entails more than meets the eye. Organizing thinking, selecting the right tool, determining the size of mark, communicating values through numbers or symbols, the craft of making. Is it straight?.. and how does it feel in the hand? ..does it read well? I give them extra length on their batten, and suggest they use the extra to experiment with mark making, to make a sample before they commit to their finished work.
After we have critiqued their rulers, I take them over to the laser cutter/engraver. We talk about the perfection of the mark. Then we talk about style, how each of their projects has an individual personality, their emerging style, much of it having to do with their imperfections, whether their marks are coarse or fine, and how to best use their innate style to their advantage. The laser engraver is their introduction to CNC (computer numerical control), which has a whole other set of challenges, but the design challenges are very similar. The knife and the chisel were our first challenges.

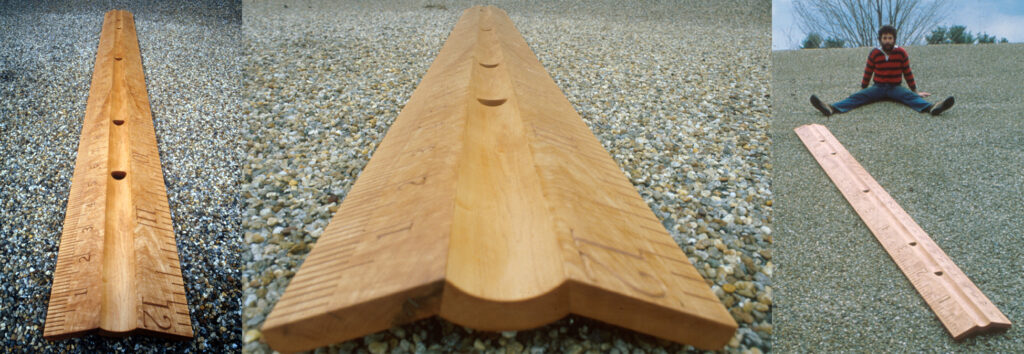
My obsession with rulers began over 40 years ago, while I was living in Portsmouth NH, and banging nails with a crew of friends. We had started up “On-the Level” construction co., a four-person carpentry crew. Our tools were a mix of old and new, but we all had a lust for old tools of which there were many available through yard sales and antique dealers. One day, I got a call from my friend Michael Aubin, informing me of a sale of the mother-load of tools from the estate of Elmer B. Trefethen of Portsmouth NH. An antique dealer named “Tiny” had acquired all of Elmer’s tools and had ‘um all laid out for sale in his shop on Main St. in Exeter NH. By the time I got tp Tiny’s shop the place was packed, I got a tool chest, a set of chisels, a set of auger drill bits and several folding boxwood rules. My ‘Boxwood Rule” was a thing of beauty, with so much information packed into a tactile rule that fit into the palm of my hand. That little rule inspired me to make several large-scale sculptural works, that celebrated mark-making and craft.